
Happy Holidays!
Well, everyone at work is making fun of me right now, lol. This time of year everyone I know is buying those cute little santa hats, including most of my friends at work. They asked why I don’t get one, and I answered honestly. As I have often mentioned here, I have a big head. So, while they are adorable, those cute santa hats always dig into my head and leave deep lines in my forehead.
Never one to be deterred, I decided I was crafty enough to make my own. And you know what? I think it came out pretty cute.
I used a pattern I found on pinterest (link found here: http://www.favecrafts.com/Crochet-Hats-Scarves-Gloves/Crochet-Santa-Hat-from-Red-Heart-Yarn/ml/1 ). I followed it exactly for the basic form of the hat. (I even used the Size H 5mm hook).
For reference, on the hat I made, color A is the green and color B is the red.
Instructions:
Brim: With A, ch 11.
Row 1: Sc in 2nd ch from hook and in each ch across, turn – 10 sc.
Row 2: Ch 1, working in back loops only, sc in each ch across.
Repeat Row 2 until piece measures 18 (20)" from beginning. Fasten off. Sew ends together to form a loop for Brim.
Crown
Round 1: With right side facing, join A with a slip st along one long side of Brim, work sc 60 (66) sts evenly spaced around, slip st to first st to join. Cut A.
Round 2: With B, ch 3 (counts as dc here and throughout), dc in each st around, slip st to top of beginning ch to join.
Rounds 3-6: Repeat Round 2.
Round 7: Ch 3, [dc2tog, dc in next 8 (9) dc] 5 times, dc2tog, dc in next 7 (8) dc, slip st to top of beginning ch to join – 54 (60) sts.
Round 8: Repeat Round 2.
Round 9: Ch 3, [dc in next 4 (5) dc, dc2tog, dc in next 3 dc] 5 times, dc in next 4 (5) dc, dc2tog, dc in next 2 dc, slip st to top of beginning ch to join – 48 (54) sts.
Round 10: Repeat Round 2.
Round 11: Ch 3, [dc2tog, dc in next 6 (7) dc] 5 times, dc2tog, dc in next 5 (6) dc, join, slip st to top of beginning ch to join – 42 (48) sts.
Round 12: Repeat Round 2.
Round 13: Ch 3, [dc in next 3 (4) dc, dc2tog, dc in next 2 dc] 5 times, dc in next 3 (4) dc, dc2tog, dc in next dc, slip st to top of beginning ch to join – 36 (42) sts.
Round 14: Repeat Round 2.
Round 15: Ch 3, [dc2tog, dc in next 4 (5) dc] 5 times, dc2tog, dc in next 3 (4) dc, slip st to top of beginning ch to join – 30 (36) sts.
Round 16: Repeat Round 2.
Round 17: Ch 3, [dc in next 2 (3) dc, dc2tog, dc in next dc] 5 times, dc in next 2 (3) dc, dc2tog, slip st to top of beginning ch to join – 24 (30) sts.
Round 18: Repeat Round 2.
For Size Large Only-Round 19: Ch 3, [dc2tog, dc in next 3 dc] 5 times, dc2tog, dc in next 2 dc, slip st to top of beginning ch to join – 24 sts.
Round 20: Repeat Round 2.
For Both Sizes-Next Round: Ch 3, [dc2tog, dc in next 2 dc] 5 times, dc2tog, dc in next dc, slip st to top of beginning ch to join – 18 sts.
Next Round: Repeat Round 2.
Next Round: Ch 3, [dc2tog, dc in next dc] 5 times, dc2tog, slip st to top of beginning ch to join – 12 sts.
Next Round: Repeat Round 2.
Next Round: Ch 3, [dc2tog] 5 times, dc in next dc, slip st to top of beginning ch to join – 7 sts. Fasten off.
Cut yarn, leaving a long tail. Thread tail through remaining sts and pull to close. Knot to secure.
FINISHING
With B, make pompom. Sew to tip of hat. Weave in ends.
Read more at http://www.favecrafts.com/Crochet-Hats-Scarves-Gloves/Crochet-Santa-Hat-from-Red-Heart-Yarn/ml/1#HLe2MIgqyEfQGTeE.99
Instructions:
Brim: With A, ch 11.
Row 1: Sc in 2nd ch from hook and in each ch across, turn – 10 sc.
Row 2: Ch 1, working in back loops only, sc in each ch across. (Please note that I did HDC here instead of SC. I hated the idea of working 20+ inches of SC. I guess I'm lazy, lol)
Repeat Row 2 until piece measures 18 (20)" from beginning. Fasten off. Sew ends together to form a loop for Brim.
Crown
Round 1: With right side facing, join A with a slip st along one long side of Brim, work sc 60 (66) sts evenly spaced around, slip st to first st to join. Cut A. Also, I think this step is a touch unclear. Basically, just SC around the entire band, working 3 SC in each corner. Also, if you hate sewing things together like I do, ignore the "sew together" step above, and when you are doing the edging for the SECOND short side, use a joining st (like you're doing attachment crochet) and work the two ends together. IMO, it makes a stronger piece. You know that stitching isn't going to come out unless the entire edging comes off. But that's just me. ONWARD WITH THE PATTERN!
Round 2: With B, ch 3 (counts as dc here and throughout), dc in each st around, slip st to top of beginning ch to join.
Rounds 3-6: Repeat Round 2.
Round 7: Ch 3, [dc2tog, dc in next 8 (9) dc] 5 times, dc2tog, dc in next 7 (8) dc, slip st to top of beginning ch to join – 54 (60) sts.
Round 8: Repeat Round 2.
Round 9: Ch 3, [dc in next 4 (5) dc, dc2tog, dc in next 3 dc] 5 times, dc in next 4 (5) dc, dc2tog, dc in next 2 dc, slip st to top of beginning ch to join – 48 (54) sts.
Round 10: Repeat Round 2.
Round 11: Ch 3, [dc2tog, dc in next 6 (7) dc] 5 times, dc2tog, dc in next 5 (6) dc, join, slip st to top of beginning ch to join – 42 (48) sts.
Round 12: Repeat Round 2.
Round 13: Ch 3, [dc in next 3 (4) dc, dc2tog, dc in next 2 dc] 5 times, dc in next 3 (4) dc, dc2tog, dc in next dc, slip st to top of beginning ch to join – 36 (42) sts.
Round 14: Repeat Round 2.
Round 15: Ch 3, [dc2tog, dc in next 4 (5) dc] 5 times, dc2tog, dc in next 3 (4) dc, slip st to top of beginning ch to join – 30 (36) sts.
Round 16: Repeat Round 2.
Round 17: Ch 3, [dc in next 2 (3) dc, dc2tog, dc in next dc] 5 times, dc in next 2 (3) dc, dc2tog, slip st to top of beginning ch to join – 24 (30) sts.
Round 18: Repeat Round 2.
For Size Large Only-Round 19: Ch 3, [dc2tog, dc in next 3 dc] 5 times, dc2tog, dc in next 2 dc, slip st to top of beginning ch to join – 24 sts.
Round 20: Repeat Round 2.
For Both Sizes-Next Round: Ch 3, [dc2tog, dc in next 2 dc] 5 times, dc2tog, dc in next dc, slip st to top of beginning ch to join – 18 sts.
Next Round: Repeat Round 2.
Next Round: Ch 3, [dc2tog, dc in next dc] 5 times, dc2tog, slip st to top of beginning ch to join – 12 sts.
Next Round: Repeat Round 2.
Next Round: Ch 3, [dc2tog] 5 times, dc in next dc, slip st to top of beginning ch to join – 7 sts. Fasten off.
Cut yarn, leaving a long tail. Thread tail through remaining sts and pull to close. Knot to secure.
FINISHING
With B, make pompom. Sew to tip of hat. Weave in ends.
After I finished, I went to the row where A & B meet (where the band meets the actual hat) and I reconnected my band yarn. I did a row around of sc, sl and join. Then for the second row I did a basic wave type of stitch (not that you can see it well in the pictures, but I wanted it to have that “elf” look with the jagged edge). I did *sc, hdc, [dc picot dc in the same st] hdc, sc, sl st to previous sc row* and repeat around.
Then, I took a bit of green yarn and tied little jingle bells to the ends of the points (this also weighed them down so the little points didn’t stick straight up, lol). Then I used the fork method (if you’re not familiar with it, check out this great video http://www.youtube.com/watch?v=KRWmDcqVmPc) to make little bows out of shoestring ribbon. Instead of tying the bows behind the fork, I put the fork behind the bell and tied the ribbon around the bell and left the ends dangling. That’s it!
I think it came out really cute, and I’m THRILLED to have a hat that fits my big ole head, lol.
And don’t think I’ve forgotten about blogging my crafts. I started working on Christmas presents in September. So, aside from the few pieces that were ordered in during that time, I’ve been working since the fall on gifts. I don’t want to blog my family’s gifts, so I’ll have a few posts to share after Christmas.
Happy holidays everyone! I’ll catch up with you in the new year!
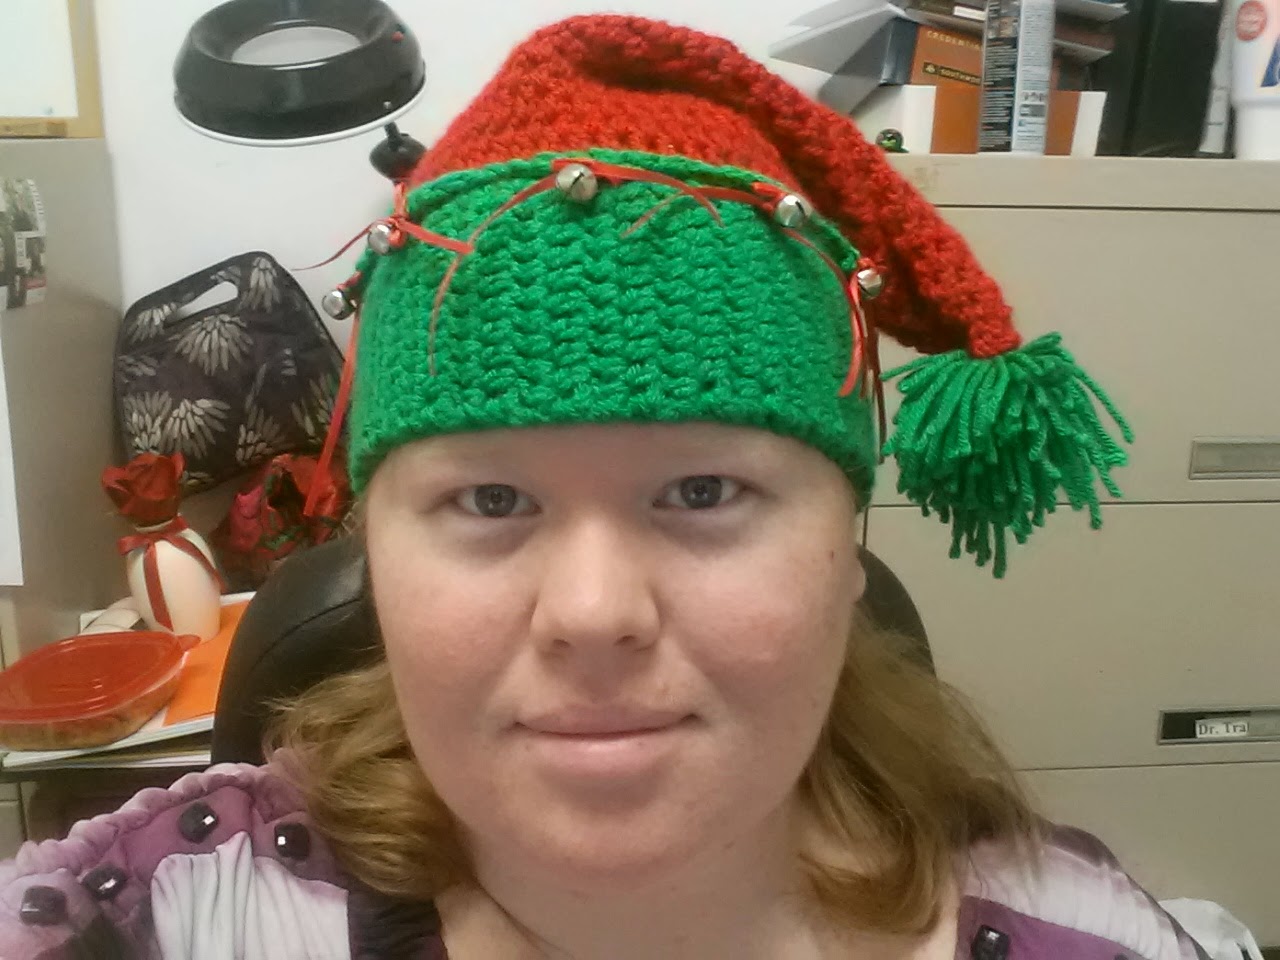
And here I am in my new hat! Merry Christmas from ChiCK Crafts!