Thursday, June 5, 2014

The ongoing remodel

And here you have it, the reason why I haven't been as crafty lately as I want to be.

My husband and I bought our first house in November. We're totally in love. But, it was built in the 70s, and I don't think it has been updated since.
It's a cutie on a dead end street in a quiet neighborhood. We've got half an acre of land, and I think it couldn't be more perfect...

...except for one major flaw.


You see that fireplace? Well the light glowing behind it is the front door. When you walked in the front door, it cleared the back of the fireplace by about 1.5 inches. It was miserable!

Well, and do you see that wood paneling? And carpet!?


Mostly, we both just hated the living room. So, we decided there was only one thing to do...


Little did we know what a project this would be! My dad is an experienced DIYer, so we figured we had this handled. We expected to be able to bring the fireplace and chimney down in an afternoon. So, we (my husband and I, my dad, my sister and her husband) got some sledgehammers and got to work!


What we weren't expecting was the fireplace to be 4 layers of brick thick with mortar poured down in between each layer. Clearly, someone did not want this thing coming down.


By the end of day one, we weren't even close to finished.


And the worst part was that the brick had to be hauled out one bucket at a time. Our yard was wet from recent rain, and we couldn't back the truck and trailer to the door. Each load had to be carried across the yard and to the driveway. It was not a fun experience.


By the end of day two, we'd made considerably more progress. We had all of the wood paneling down, the carpet up, the wall paper ripped out of the entry way, and only a couple of feet of brick to go.


At the end of day three, we had the entire thing down (including the bricks that were about 1 and a half deep set into the foundation. We were left with a pile of rubble, a hole in the floor and a hole in the ceiling that ran all the way out of the roof.


With rain coming, we tacked down a tarp on the roof and let mother nature come!

Then, we hired a drywall specialist to come in and give us walls (and repair the hole in the ceiling....which almost meant scraping off all the "popcorn" on the ceiling and replacing it with an "orange peel" so it matched)!

In the mean time, my dad and husband repaired the roof.

The drywall guy did a fantastic job!


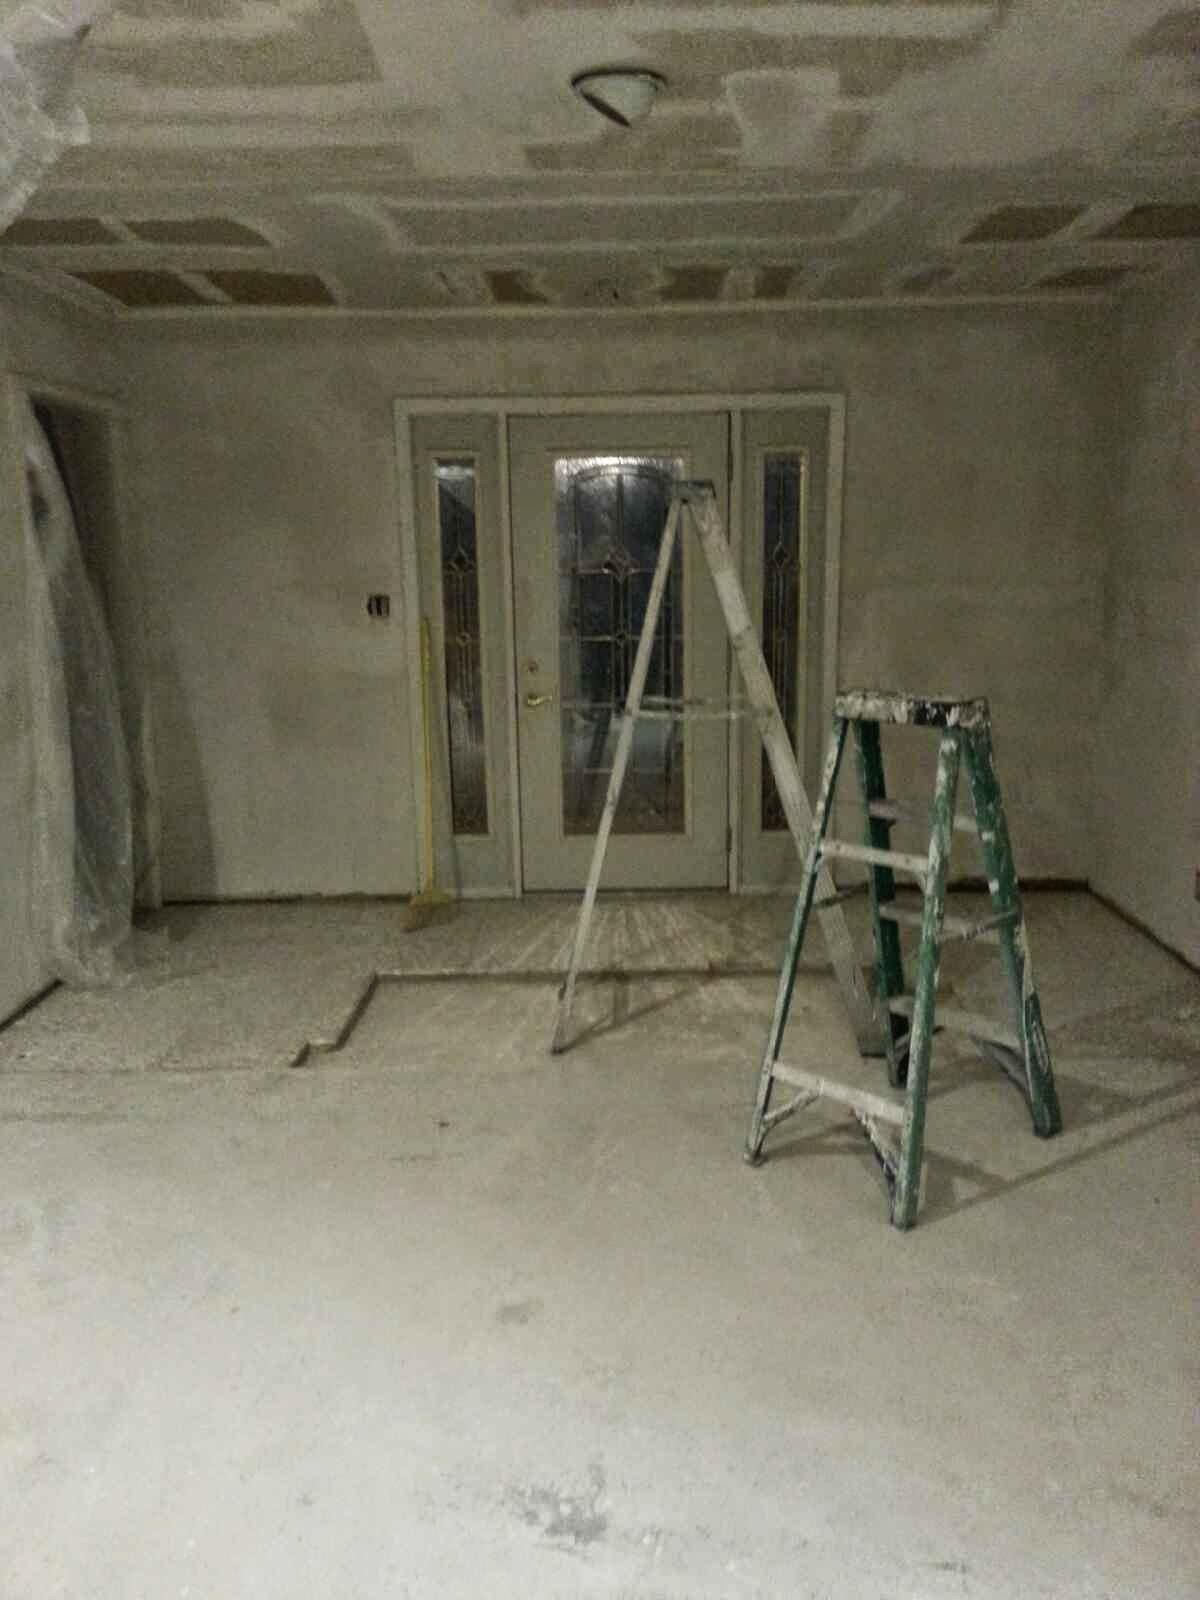
This is before he added the texturing. You can see the hole in the floor and the patch in the ceiling in the above picture. 


Next we painted (this is while the paint is still drying, thus the uneven spots).


All that work and we're still not finished!!!!! Be on the look out for Part 2 when we paint the book shelf!


Recycled Bubble Quilt

For those of you who have been following me, you know that every year my work hosts a big bash for Earth Day. We have green vendors come, we do an art auction of items made from recyclables, and we do a style show with outfits made from recycled materials, as well.

It is always a fun event, and I love participating.

Last year I made several paintings using magazine pages.

This year I decided to push myself. My mom sent me the link to something I'd never seen before, a bubble quilt (also known as a biscuit quilt). The tutorial was fantastic, so I thought I'd give it a try.

The key was, though, that I had to find a way to make it out of recycled materials and still have people want to curl up under it.

My husband and sister had both recently junked some jeans that I was saving (woot woot for losing weight!) so I thought I could start with those. My husband and I used to work at the same place, and so we both had old uniform shirts tucked away in a drawer (painting shirts mostly...wait until my next post!).

The combination of green work shirt and multicolored denim hit me perfectly and I decided to go with it.

If you're looking for detailed instructions, check out this pattern from Awaiting Ada. She has a couple of different versions and does a fantastic job explaining step by step how to put this sucker together.

First thing was to cut out the "bubble" pieces for the quilt top.


I cut around the seams and grabbed all the useful denim I could. Then I grabbed my trust rotary tool and a self-healing mat and started cutting them down into 6"x 6" squares. This took me about 5 eight hour days....did I fail to mention that even though this was a recycled quilt and only cost me about $30, it was extremely labor intensive?


Once all of the top pieces were cut, I had to cut the backing pieces for the quilt top (to make each piece a "bubble." Don't worry about picking a good fabric for these. They will not be seen on the actual quilt. I had several work shirts left over, so that's what I used. These were cut 4.5" x 4.5". Then they needed a small slit down the middle for stuffing later (you'll see). My exacto knife made quick work of those slits.

Next came the pinning. This took me about 2 days to finish. One big piece is pinned to one small piece, wrong sides facing. First you pin the corners (which will have a tendency to roll inward, as in the pic below. This is NOT a big deal!) then you pin a pleat in the middle of each side.Just let them pleat wherever they want to - it is not important that the pleats be even or anything, just that the top piece lays flat against the bottom piece.

Then run a seam around the edge of each piece. It doesn't have to be pretty, just try to get it as close to the edge as possible. That is one mistake I made. Here, I ran the seam with the fabric at the edge of the foot.


Next you're going to start stringing them together in a line. My blanket was 11 squares by 15. So, I sewed the 11 squares together to make each strip. 


Then start sewing the strips together.


Sorry, but I didn't take and photos of this next part. After you have the whole quilt top finished, flip it over and start stuffing. Grab about a handful of poly-fill and stuff each bubble through the slit you cut into each bubble back. You do not want to over stuff them because it will make them harder to sew later.

Next is the fun part. You're going to have to hand sew each slit closed. I used yarn and a large needle because the wide strokes made it go faster. Even with that, it took me about two days (and eventually an extra pair of hands) to knock it out.

Finally! Sew your backing fabric on, with right sides facing. Leave a several inch hole in the middle of one side and flip the blanket inside out. Then hand sew the opening shut.

AAAAAAND you're done. So there you have it, my first bubble quilt. All said and done, I think the green and blue were too close together in color to clearly show the chevron pattern, but I was still pretty happy with the outcome.


Prom Corsage!

Howdy howdy blog folk!

It's been a busy spring!

I've been working on a ton of projects. No telling how many I'll actually get posted up here for y'all, but I'm going to try and get a few knocked out today. This first one is the easiest.

My 16 year old cousin went to her first prom this year. I wanted to get her a wrist corsage, just as something small to let her know I was thinking of her. But holy cow are they expensive! I get it, real flowers cost money. But, as a young woman early in her career, those kinds of funds ($30-50 for a wristlet she is going to wear once for 3 hours? Not so sure on that one) are a little out of reach for me.

So I decided I could make her one and it look just as nice...I hoped.

I went to hobby lobby and picked up some wedding picks when they were on sale. You know, this kind of stuff...

I ended up spending about $15 and having a TON of stuff left over. Next time I think I could get away with spending about $5...seriously.

Her dress was black with orange flowers on it, and I heard she was worried her nails would look to halloween-y if she matched, so I tried to be careful but still match her colors. What I ended up with were black and white flowers and orange ribbon.

I grabbed a paper backing for a small mum and a wristlet with a velcro adjustable strap. Then I just starting placing.

I laid everything out on the backing and when I was happy with it, I got to work with my hot glue gun.


I used iridescent white leaves, gem picks for some sparkle, black bead/gem picks (as seen in first photo) and the burnt orange ribbon cut in loops.
I went through several versions until I was happy, but all in all the entire thing took less than half an hour to put together. I think it came out pretty nice!


And of course she looked model gorgeous, as usual. :) Love this girl.


Monday, January 6, 2014

Stormtrooper Blanket


This was a gift for my brother-in-law for Christmas. We’re kind of a nerd family, so this seemed like the right gift for him. J
It was a simple enough to make, it was just granny squares. All that matters is getting the pattern right, which I have attached for your viewing pleasure, hehe.

All in all, it took me about 6 weeks to make. I finished about 10 squares a day. I could have finished in 4-5 weeks, but I wasn’t consistent. As far as size, the picture below of the full blanket is on my king sized bed. I made each granny square 5 rows and worked with a size H hook. So, all 224 squares put together came out to approximately 6 x 6.5 feet. Make each square as big as you'd like and connect each one attachment style to the next one.

Peace Sign Blanket


This peace sign blanket was a Christmas gift for my 12-year-old niece. She’s very into the whole peace sign thing right now (I guess it’s big with the tweens and teens) so I thought it would be a nice gift for her.
It is a modification to the circles-to-squares style of blanket. I found the pattern here (http://sofar-sogood.blogspot.com/2008/06/peace-granny.html).
The first few rounds can be a little rough, but once you get through them, this is a very simple pattern. That being said, I was not a fan of the original work entirely. If you take a look at the link, you’ll see that around the edge of the peace sign, there is a row of strange chain stitching. I’m more of a fan of solid work, so I decided to modify this pattern to be solid blocks without the granny-reminiscent holes.
Below is my modified pattern for each square:
With A: Ch 4 and join to form a ring (or use a Magic Ring). I used the magic ring.
Rnd 1) ch 1, work 12 sc in ring, join with slst in FL of beg sc.
Rnd 2) ch 3, dc in nxt st, dc in FL of next st. With B: dc in back loop (BL) of same st, 2 dc in nxt st, dc in nxt st, dc in BL of same st. With A: dc in FL of same st, dc in nxt st, dc in FL of nxt st. With B: dc in BL of same st. With A: dc in FL of same st, dc in nxt st, dc in FL of nxt st. With B: dc in BL of same st. With A: dc in FL of same st, dc in nxt st, dc in FL of nxt st. With B: dc in BL of same st, dc in same st (both loops), 2 dc in nxt st, dc in BL of same st as beg ch3, join with slst to beg ch3. = 24 dc
Rnd 3) With A: Ch 3, (dc in nxt st) x 2. With B: (2 dc in nxt st) x 5. *With A: (dc in nxt st) x 3. With B: (2 dc in nxt st). Rpt from * once. With A: (dc in nxt st) x 3. With B: (2 dc in nxt st) x 5, join with slst to beg ch3. = 36 dc
Rnd 4) With A: Ch 3, (dc in nxt st) x 2. With B: (2 dc in nxt st, dc in nxt 2 st) x 3, 2 dc in nxt st. *With A: (dc in nxt st) x 3. With B: (2 dc in nxt st) x 2. Rpt from * once. With A: (dc in nxt st) x 3. With B: (2 dc in nxt st, dc in nxt 2 st) x 3, 2 dc in nxt st, join with slst to beg ch3. = 48 dc
Rnd 5) With A: Ch 3, (dc in nxt st) x 2. With B: (2 dc in nxt st, dc in nxt 3 st) x 3, 2 dc in nxt st, dc in nxt st. *With A: (dc in nxt st) x 3. With B: 2 dc in nxt st, dc in nxt 2 st, 2 dc in nxt st. Rpt from * once. With A: (dc in nxt st) x 3. With B: (2 dc in nxt st, dc in nxt 3 st) x 3, 2 dc in nxt st, dc in nxt st, join with slst to beg ch3. = 60 dc
Rnd 6) With A: ch 3, dc in nxt 3 st, (2 dc in nxt st, dc in nxt 4 st) x 11, 2 dc in nxt st, join with slst to beg ch3. Finish off A or your preferred color change to color B.
Rnd 7: sc around entire work to create a hard edge
Rnd 8: (you should be in the middle of the top bar of the peace sign. Ch 1. Sc in each of next 3 sts. HDC in each of next 2 sts. DC in each of next 2 sts. Treble crochet in next st. 5 treble crochet in next st to form corner. [Treble crochet in next st. DC in each of next 2 sts. HDC in each of next 2 sts. SC in next 7 sts. HDC in each of next 2 sts. DC in each of next 2 sts. Treble crochet in next st 5 treble crochet in next st to form corner.] Repeat inside of brackets for 3 remaining sides. For original side, Treble crochet in next st. DC in each of next 2 sts. HDC in each of next 2 sts. SC in next 3 sts. Sl st to chain to join.
Rnd 9: DC sround, working 3 in each corner.
After this I switched to black and did a row of SC around.
As I made each piece, I connected them attachment style during this black round. It created a beautiful, solid piece of work. I’m very happy with it.


Viking Helm with Beard! *updated*

And so begins the long string of long promised post-Christmas crafts!


I had a ton of fun with this one. It was originally intended to be a gift for my other brother-in-law, but I decided I wanted to keep it and gave him a bottle of liquor instead.
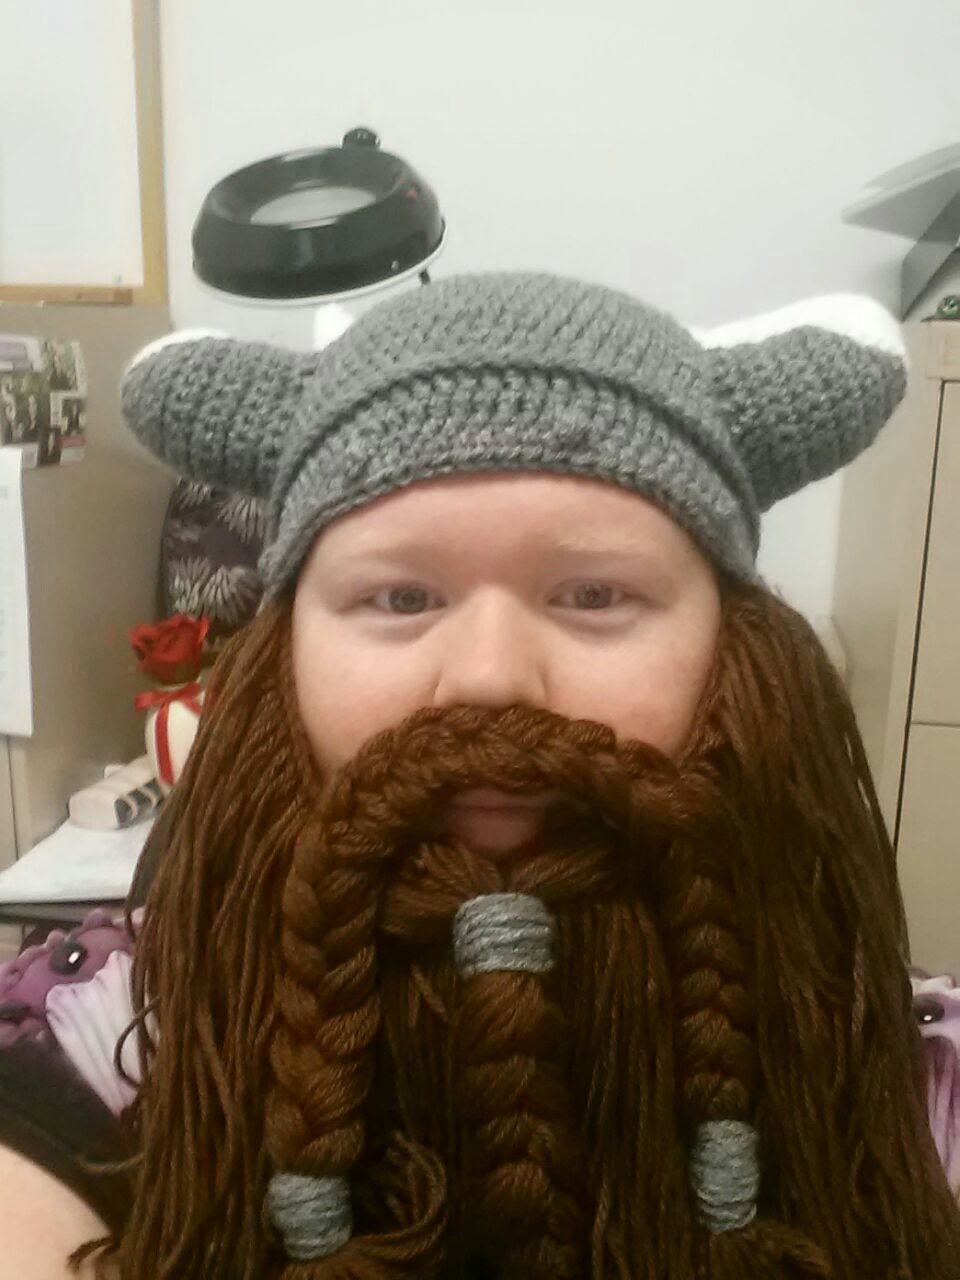
I used this pattern (http://www.craftown.com/Viking-Beard-Hat.html) with the only modification being in the styling of the beard. I liked the idea of doing the lord of the rings style dwarven beard instead. (and obviously I had to add some length because of my giant sized head…but that should be a given at this point).
I wore it to my family’s new years eve get together, and everyone loved it! They all insisted on trying it on (even though it was huge on everyone- including my dad, lol) and we had a lot of fun wearing it around the house and scaring my 3 year old niece. We’re not nice people, haha.


To follow up, my brother in law was insanely jealous and begged me to make one for him, too. So, here it is. 

The beard is a little long on his face (part of the beard is supposed to be a 'stache) and I still need to fix it. But otherwise I think it looks great, and I love the mix of colors!

Tuesday, December 17, 2013

Christmas Hat!


Happy Holidays!
Well, everyone at work is making fun of me right now, lol. This time of year everyone I know is buying those cute little santa hats, including most of my friends at work. They asked why I don’t get one, and I answered honestly. As I have often mentioned here, I have a big head. So, while they are adorable, those cute santa hats always dig into my head and leave deep lines in my forehead.
Never one to be deterred, I decided I was crafty enough to make my own. And you know what? I think it came out pretty cute.
I used a pattern I found on pinterest (link found here: http://www.favecrafts.com/Crochet-Hats-Scarves-Gloves/Crochet-Santa-Hat-from-Red-Heart-Yarn/ml/1 ). I followed it exactly for the basic form of the hat. (I even used the Size H 5mm hook).
For reference, on the hat I made, color A is the green and color B is the red.
Instructions:
Brim: With A, ch 11.
Row 1: Sc in 2nd ch from hook and in each ch across, turn – 10 sc.
Row 2: Ch 1, working in back loops only, sc in each ch across.
  Repeat Row 2 until piece measures 18 (20)" from beginning. Fasten off. Sew ends together to form a loop for Brim.

Crown
Round 1: With right side facing, join A with a slip st along one long side of Brim, work sc 60 (66) sts evenly spaced around, slip st to first st to join. Cut A.
Round 2: With B, ch 3 (counts as dc here and throughout), dc in each st around, slip st to top of beginning ch to join.
Rounds 3-6: Repeat Round 2.
Round 7: Ch 3, [dc2tog, dc in next 8 (9) dc] 5 times, dc2tog, dc in next 7 (8) dc, slip st to top of beginning ch to join – 54 (60) sts.
Round 8: Repeat Round 2.
Round 9: Ch 3, [dc in next 4 (5) dc, dc2tog, dc in next 3 dc] 5 times, dc in next 4 (5) dc, dc2tog, dc in next 2 dc, slip st to top of beginning ch to join – 48 (54) sts.
Round 10: Repeat Round 2.
Round 11: Ch 3, [dc2tog, dc in next 6 (7) dc] 5 times, dc2tog, dc in next 5 (6) dc, join, slip st to top of beginning ch to join – 42 (48) sts.
Round 12: Repeat Round 2.
Round 13: Ch 3, [dc in next 3 (4) dc, dc2tog, dc in next 2 dc] 5 times, dc in next 3 (4) dc, dc2tog, dc in next dc, slip st to top of beginning ch to join – 36 (42) sts.
Round 14: Repeat Round 2.
Round 15: Ch 3, [dc2tog, dc in next 4 (5) dc] 5 times, dc2tog, dc in next 3 (4) dc, slip st to top of beginning ch to join – 30 (36) sts.
Round 16: Repeat Round 2.
Round 17: Ch 3, [dc in next 2 (3) dc, dc2tog, dc in next dc] 5 times, dc in next 2 (3) dc, dc2tog, slip st to top of beginning ch to join – 24 (30) sts.
Round 18: Repeat Round 2.
For Size Large Only-Round 19: Ch 3, [dc2tog, dc in next 3 dc] 5 times, dc2tog, dc in next 2 dc, slip st to top of beginning ch to join – 24 sts.
Round 20: Repeat Round 2.
For Both Sizes-Next Round: Ch 3, [dc2tog, dc in next 2 dc] 5 times, dc2tog, dc in next dc, slip st to top of beginning ch to join – 18 sts.
Next Round: Repeat Round 2.
Next Round: Ch 3, [dc2tog, dc in next dc] 5 times, dc2tog, slip st to top of beginning ch to join – 12 sts.
Next Round: Repeat Round 2.
Next Round: Ch 3, [dc2tog] 5 times, dc in next dc, slip st to top of beginning ch to join – 7 sts. Fasten off.

Cut yarn, leaving a long tail. Thread tail through remaining sts and pull to close. Knot to secure.

FINISHING
With B, make pompom. Sew to tip of hat. Weave in ends. 

Read more at http://www.favecrafts.com/Crochet-Hats-Scarves-Gloves/Crochet-Santa-Hat-from-Red-Heart-Yarn/ml/1#HLe2MIgqyEfQGTeE.99
Instructions:
Brim: With A, ch 11.
Row 1: Sc in 2nd ch from hook and in each ch across, turn – 10 sc.
Row 2: Ch 1, working in back loops only, sc in each ch across.
  Repeat Row 2 until piece measures 18 (20)" from beginning. Fasten off. Sew ends together to form a loop for Brim.

Crown
Round 1: With right side facing, join A with a slip st along one long side of Brim, work sc 60 (66) sts evenly spaced around, slip st to first st to join. Cut A.
Round 2: With B, ch 3 (counts as dc here and throughout), dc in each st around, slip st to top of beginning ch to join.
Rounds 3-6: Repeat Round 2.
Round 7: Ch 3, [dc2tog, dc in next 8 (9) dc] 5 times, dc2tog, dc in next 7 (8) dc, slip st to top of beginning ch to join – 54 (60) sts.
Round 8: Repeat Round 2.
Round 9: Ch 3, [dc in next 4 (5) dc, dc2tog, dc in next 3 dc] 5 times, dc in next 4 (5) dc, dc2tog, dc in next 2 dc, slip st to top of beginning ch to join – 48 (54) sts.
Round 10: Repeat Round 2.
Round 11: Ch 3, [dc2tog, dc in next 6 (7) dc] 5 times, dc2tog, dc in next 5 (6) dc, join, slip st to top of beginning ch to join – 42 (48) sts.
Round 12: Repeat Round 2.
Round 13: Ch 3, [dc in next 3 (4) dc, dc2tog, dc in next 2 dc] 5 times, dc in next 3 (4) dc, dc2tog, dc in next dc, slip st to top of beginning ch to join – 36 (42) sts.
Round 14: Repeat Round 2.
Round 15: Ch 3, [dc2tog, dc in next 4 (5) dc] 5 times, dc2tog, dc in next 3 (4) dc, slip st to top of beginning ch to join – 30 (36) sts.
Round 16: Repeat Round 2.
Round 17: Ch 3, [dc in next 2 (3) dc, dc2tog, dc in next dc] 5 times, dc in next 2 (3) dc, dc2tog, slip st to top of beginning ch to join – 24 (30) sts.
Round 18: Repeat Round 2.
For Size Large Only-Round 19: Ch 3, [dc2tog, dc in next 3 dc] 5 times, dc2tog, dc in next 2 dc, slip st to top of beginning ch to join – 24 sts.
Round 20: Repeat Round 2.
For Both Sizes-Next Round: Ch 3, [dc2tog, dc in next 2 dc] 5 times, dc2tog, dc in next dc, slip st to top of beginning ch to join – 18 sts.
Next Round: Repeat Round 2.
Next Round: Ch 3, [dc2tog, dc in next dc] 5 times, dc2tog, slip st to top of beginning ch to join – 12 sts.
Next Round: Repeat Round 2.
Next Round: Ch 3, [dc2tog] 5 times, dc in next dc, slip st to top of beginning ch to join – 7 sts. Fasten off.

Cut yarn, leaving a long tail. Thread tail through remaining sts and pull to close. Knot to secure.

FINISHING
With B, make pompom. Sew to tip of hat. Weave in ends. 


Read more at http://www.favecrafts.com/Crochet-Hats-Scarves-Gloves/Crochet-Santa-Hat-from-Red-Heart-Yarn/ml/1#HLe2MIgqyEfQGTeE.99
Instructions:
Brim: With A, ch 11.
Row 1: Sc in 2nd ch from hook and in each ch across, turn – 10 sc.
Row 2: Ch 1, working in back loops only, sc in each ch across.
  Repeat Row 2 until piece measures 18 (20)" from beginning. Fasten off. Sew ends together to form a loop for Brim.

Crown
Round 1: With right side facing, join A with a slip st along one long side of Brim, work sc 60 (66) sts evenly spaced around, slip st to first st to join. Cut A.
Round 2: With B, ch 3 (counts as dc here and throughout), dc in each st around, slip st to top of beginning ch to join.
Rounds 3-6: Repeat Round 2.
Round 7: Ch 3, [dc2tog, dc in next 8 (9) dc] 5 times, dc2tog, dc in next 7 (8) dc, slip st to top of beginning ch to join – 54 (60) sts.
Round 8: Repeat Round 2.
Round 9: Ch 3, [dc in next 4 (5) dc, dc2tog, dc in next 3 dc] 5 times, dc in next 4 (5) dc, dc2tog, dc in next 2 dc, slip st to top of beginning ch to join – 48 (54) sts.
Round 10: Repeat Round 2.
Round 11: Ch 3, [dc2tog, dc in next 6 (7) dc] 5 times, dc2tog, dc in next 5 (6) dc, join, slip st to top of beginning ch to join – 42 (48) sts.
Round 12: Repeat Round 2.
Round 13: Ch 3, [dc in next 3 (4) dc, dc2tog, dc in next 2 dc] 5 times, dc in next 3 (4) dc, dc2tog, dc in next dc, slip st to top of beginning ch to join – 36 (42) sts.
Round 14: Repeat Round 2.
Round 15: Ch 3, [dc2tog, dc in next 4 (5) dc] 5 times, dc2tog, dc in next 3 (4) dc, slip st to top of beginning ch to join – 30 (36) sts.
Round 16: Repeat Round 2.
Round 17: Ch 3, [dc in next 2 (3) dc, dc2tog, dc in next dc] 5 times, dc in next 2 (3) dc, dc2tog, slip st to top of beginning ch to join – 24 (30) sts.
Round 18: Repeat Round 2.
For Size Large Only-Round 19: Ch 3, [dc2tog, dc in next 3 dc] 5 times, dc2tog, dc in next 2 dc, slip st to top of beginning ch to join – 24 sts.
Round 20: Repeat Round 2.
For Both Sizes-Next Round: Ch 3, [dc2tog, dc in next 2 dc] 5 times, dc2tog, dc in next dc, slip st to top of beginning ch to join – 18 sts.
Next Round: Repeat Round 2.
Next Round: Ch 3, [dc2tog, dc in next dc] 5 times, dc2tog, slip st to top of beginning ch to join – 12 sts.
Next Round: Repeat Round 2.
Next Round: Ch 3, [dc2tog] 5 times, dc in next dc, slip st to top of beginning ch to join – 7 sts. Fasten off.

Cut yarn, leaving a long tail. Thread tail through remaining sts and pull to close. Knot to secure.

FINISHING
With B, make pompom. Sew to tip of hat. Weave in ends. 


Read more at http://www.favecrafts.com/Crochet-Hats-Scarves-Gloves/Crochet-Santa-Hat-from-Red-Heart-Yarn/ml/1#HLe2MIgqyEfQGTeE.99

Instructions:
Brim: With A, ch 11.
Row 1: Sc in 2nd ch from hook and in each ch across, turn – 10 sc.
Row 2: Ch 1, working in back loops only, sc in each ch across. (Please note that I did HDC here instead of SC. I hated the idea of working 20+ inches of SC. I guess I'm lazy, lol)
  Repeat Row 2 until piece measures 18 (20)" from beginning. Fasten off. Sew ends together to form a loop for Brim.

Crown
Round 1: With right side facing, join A with a slip st along one long side of Brim, work sc 60 (66) sts evenly spaced around, slip st to first st to join. Cut A. Also, I think this step is a touch unclear. Basically, just SC around the entire band, working 3 SC in each corner. Also, if you hate sewing things together like I do, ignore the "sew together" step above, and when you are doing the edging for the SECOND short side, use a joining st (like you're doing attachment crochet) and work the two ends together. IMO, it makes a stronger piece. You know that stitching isn't going to come out unless the entire edging comes off. But that's just me. ONWARD WITH THE PATTERN!
Round 2: With B, ch 3 (counts as dc here and throughout), dc in each st around, slip st to top of beginning ch to join.
Rounds 3-6: Repeat Round 2.
Round 7: Ch 3, [dc2tog, dc in next 8 (9) dc] 5 times, dc2tog, dc in next 7 (8) dc, slip st to top of beginning ch to join – 54 (60) sts.
Round 8: Repeat Round 2.
Round 9: Ch 3, [dc in next 4 (5) dc, dc2tog, dc in next 3 dc] 5 times, dc in next 4 (5) dc, dc2tog, dc in next 2 dc, slip st to top of beginning ch to join – 48 (54) sts.
Round 10: Repeat Round 2.
Round 11: Ch 3, [dc2tog, dc in next 6 (7) dc] 5 times, dc2tog, dc in next 5 (6) dc, join, slip st to top of beginning ch to join – 42 (48) sts.
Round 12: Repeat Round 2.
Round 13: Ch 3, [dc in next 3 (4) dc, dc2tog, dc in next 2 dc] 5 times, dc in next 3 (4) dc, dc2tog, dc in next dc, slip st to top of beginning ch to join – 36 (42) sts.
Round 14: Repeat Round 2.
Round 15: Ch 3, [dc2tog, dc in next 4 (5) dc] 5 times, dc2tog, dc in next 3 (4) dc, slip st to top of beginning ch to join – 30 (36) sts.
Round 16: Repeat Round 2.
Round 17: Ch 3, [dc in next 2 (3) dc, dc2tog, dc in next dc] 5 times, dc in next 2 (3) dc, dc2tog, slip st to top of beginning ch to join – 24 (30) sts.
Round 18: Repeat Round 2.
For Size Large Only-Round 19: Ch 3, [dc2tog, dc in next 3 dc] 5 times, dc2tog, dc in next 2 dc, slip st to top of beginning ch to join – 24 sts.
Round 20: Repeat Round 2.
For Both Sizes-Next Round: Ch 3, [dc2tog, dc in next 2 dc] 5 times, dc2tog, dc in next dc, slip st to top of beginning ch to join – 18 sts.
Next Round: Repeat Round 2.
Next Round: Ch 3, [dc2tog, dc in next dc] 5 times, dc2tog, slip st to top of beginning ch to join – 12 sts.
Next Round: Repeat Round 2.
Next Round: Ch 3, [dc2tog] 5 times, dc in next dc, slip st to top of beginning ch to join – 7 sts. Fasten off.

Cut yarn, leaving a long tail. Thread tail through remaining sts and pull to close. Knot to secure.

FINISHING
With B, make pompom. Sew to tip of hat. Weave in ends. 

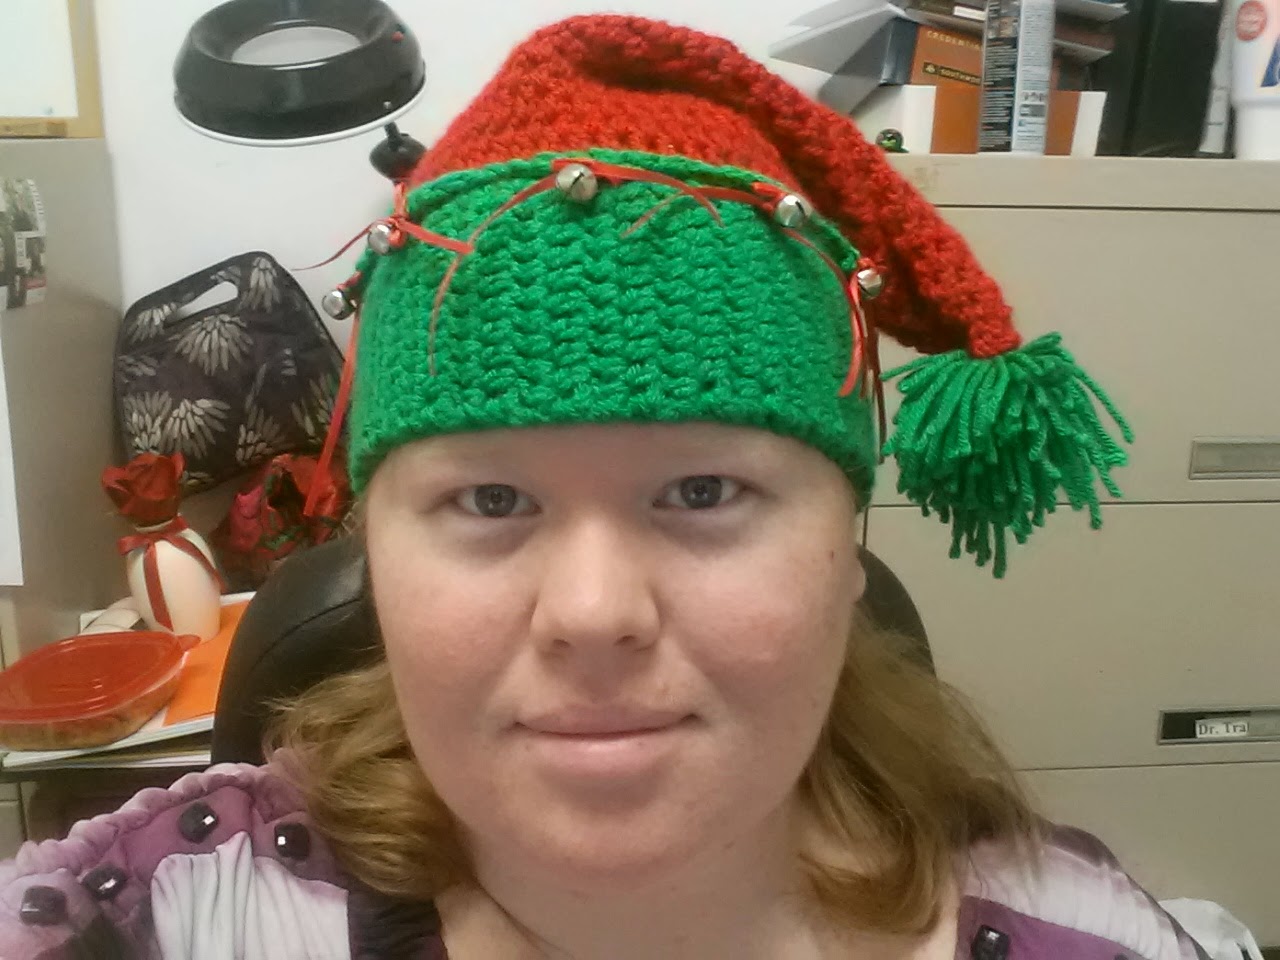
After I finished, I went to the row where A & B meet (where the band meets the actual hat) and I reconnected my band yarn. I did a row around of sc, sl and join. Then for the second row I did a basic wave type of stitch (not that you can see it well in the pictures, but I wanted it to have that “elf” look with the jagged edge). I did *sc, hdc, [dc picot dc in the same st] hdc, sc, sl st to previous sc row* and repeat around.
Then, I took a bit of green yarn and tied little jingle bells to the ends of the points (this also weighed them down so the little points didn’t stick straight up, lol). Then I used the fork method (if you’re not familiar with it, check out this great video http://www.youtube.com/watch?v=KRWmDcqVmPc) to make little bows out of shoestring ribbon. Instead of tying the bows behind the fork, I put the fork behind the bell and tied the ribbon around the bell and left the ends dangling. That’s it!
I think it came out really cute, and I’m THRILLED to have a hat that fits my big ole head, lol.
And don’t think I’ve forgotten about blogging my crafts. I started working on Christmas presents in September. So, aside from the few pieces that were ordered in during that time, I’ve been working since the fall on gifts. I don’t want to blog my family’s gifts, so I’ll have a few posts to share after Christmas.
Happy holidays everyone!  I’ll catch up with you in the new year!


And here I am in my new hat! Merry Christmas from ChiCK Crafts!